Saturday, October 10, 2009

Autumn

I made a rag wreath to put up for autumn. I followed the instructions here and it was a breeze, I only had to cut into a couple of fabrics to get a wider variety of colours - the rest came from the scrap box and were mostly in strips anyway.
Since I started reading blogs, especially ones from the US, I've wanted to put up decorations for autumn. A couple of years ago I started to collect ceramic pumpkins when I could find them (which is not many places) so that I too could decorate my house in a seasonal way.
The husband does not understand this at all and was heard to moan that 'no-one else has ivy and pumpkins on their mantelpiece'. No imagination. He also insists that the clock remains in the middle of the mantelpiece. (In case you thought I thought it looked good with the pumpkins).
I don't go too much for real pumpkins - when my daughter was little we made the mistake of giving our carved pumpkin a name and she was upset when I said I would have to throw it away. Unbeknown to us she retrieved it from the bin - we only discovered this when a really terrible smell manifested itself in her bedroom and was tracked down to the now-mouldy pumpkin. Shortly afterwards Pumpkin went on holiday, on the train (and she believed us).


Tuesday, September 08, 2009

Pansy Doiley


I've surprised myself with this doiley. I taught myself to crochet from a book (so I suspect I may well be doing lots of things wrong) but I've only ever really crocheted granny squares and afghans before. I shamelessly took inspiration for the doiley from this one that I saw on Knot Garden's lovely blog. Took a while to do all of the 16 pansies but I finished it whilst in Wales at the end of August. It was meant to be a Christmas present for my Mum, but she saw the pansies in my workbag and asked what they were for so that was that secret out of the bag.

Saturday, July 04, 2009

The Tropics?


No - the Palm House at Kew Gardens. Last weekend (yeah, I know, I'm Johnny Come Lately when it comes to posting) my Mum and I had a city break in London. On Saturday afternoon we took the train to Kew and believe me, it might as well have been the tropics it was so hot. I don't think I've seen so many pretty summer dresses in years.

You can just see the edge of the Palm House peeping out of the top right hand corner of the photograph above. We only managed a small portion of the whole gardens - I'd like to go back again. On Sunday we went to the Royal Academy Summer Exhibition in the morning and in the afternoon to the final performance of Latin Fever, starring Darren & Lilia from Strictly Come Dancing. (The next series of which, by the way, I shall boycott if the newspaper reports are true and they are going to get rid of Arlene Phillips in favour of a younger model - good grief, she's only a year older than Len Goodman and no-one's talking about getting rid of him.)


So, nothing on the creative front to report, think I've got ennui.


Sunday, June 21, 2009

Wales

Some pictures from our annual holiday to Wales at half-term. My family have been going to the same place since 1948. It hasn't changed much, we always joke that it's like stepping back into the 1950's - yellow cellophane on the dress shop windows, a 'Picture House' with the week's film chalked on a blackboard above the door. My kids fish in the same rock pools that me and my cousins used to and make sandcastles on the same beach.


Saturday, May 09, 2009

I've gone back to the knitting - I've seen this little bunny egg cosy on so many blogs that I had to buy the pattern from Little Cotton Rabbits. I'm not very good at doing the faces - the one on the left is about the best - the one in the middle has one eye that is larger than the other and the one on the right has a funny nose. I hope I'll improve but the sad thing is that I did the one on the left first.

I wanted to try out some different colours but cotton yarn can be on the pricey side so I went online and found Texere Yarns - they do lots of yarns at very reasonable prices so I ordered these nice bright 4ply cottons in 40g reels.

Sunday, May 03, 2009

A Finish

The cot quilt is finished - big enough to last a while I hope. I had some red and white wavy stripe fabric on hand which was ideal for the backing. You can see how very simply I quilted it - but it was enough, I think, and meant I could avoid the bulky bits where 8 seams meet which would have been a recipe for disaster as far as my quilting is concerned.


Sunday, April 26, 2009

Remember these?

Well, I'm pleased to say that they did eventually transform themselves into a bear. I don't know why I left it so long to sew them up because it was easy peasy when I finally got round to it, mainly because you don't need to darn in the ends if they are going to be inside the bear anyway.

I think I might call him Norbert (pronounced the French way - i.e. 'Nor-bear').

Saturday, April 18, 2009

Hour Glass Quilt Top

I finished a top! Yay for me! Can't you just tell it's Easter and I've been on holiday over a week? I've had a lovely time doing whatever I wanted whenever I wanted - no deadlines to meet, no 'to do' lists to worry about. Just a bit of crafting here, a bit of spring cleaning there (but not too much - got to pace myself, you know) with a bit of reading in between.


This is the cot quilt I'm making for my friend's new baby. (If you click for a close up, excuse the stray threads but the sun was out so I had to run outside to photograph it whilst the going was good - I will snip them off later.) Had the devil of a job to avoid the same fabrics being too close to each other - I just gave up in the end and hoped for the best.


I'm hoping it won't take too long to quilt - I'm just going to do nice, simple, straight lines. Next up will be a quilt for DD to take to university in the autumn - she has requested it especially so I can't disappoint her. It reminds me of when I went to university and my Nan crocheted me an afghan to put on my bed - it really brightened up my room and everyone liked it ... seems like a long time ago now.

Thursday, April 16, 2009

Better late than never

Okay, so I missed the Easter boat - I did change my blog banner to show my Polish painted eggs but as I didn't post before Easter that was a fat lot of good. Then, I saw these chicks at Knot Garden, who linked to the pattern at Fuzzy Thoughts. Quick, made all in one piece, got to be my kind of activity - albeit that I made it yesterday instead of before Easter.

I was full of good intentions at Christmas to really make an effort to post more regularly but I seem to have fallen by the wayside again - I think I'll stop going on about it and just accept that work gets in the way and there's only so much that I can do.

How do you keep patterns that you print off the Internet? Not long ago I bought a laminator from Aldi - they are really cheap nowadays. I've found it really useful for laminating instructions - saves them from getting all creased and I like to be able to prop them up where I can see them when following the instructions. I keep them in a box file.


Sunday, March 08, 2009

Notebooks

I don't buy many 'novelty' fabrics - they're not really my thing, but occasionally I can't resist the general overall design so I buy them and worry about what to make with them later. I don't like to cut them up small because you lose the effect of the large pattern. So, I take them out, look at them fondly and put them back again. Until now. I came across this great tutorial from Bloom and Blossom via Sew Mama Sew and it's just what I've been looking for. So far I've made 5 notebook covers and I'm going to be making more - they are so quick and inexpensive to make and excellent for keeping by when you need an emergency gift or indeed just a gift for the sake of it. My Dad has earmarked the Landscape one for himself, DD has bagged the Bon Voyage one and my Mum likes the teacups.

I made the notebook on the right in the picture above the same as the instructions - I didn't have any linen so I used a sort of linen-look instead. Now I could have said 'faux linen' if I'd wanted to. The word 'faux' always makes me laugh. When I was young we called man-made fur 'fake fur', then all of a sudden a few years ago it seemed to become 'faux fur'. Why? Does using the word 'faux' make it more up-market - it only means fake in French? What word do the French use? When my brother told me he had bought a 'faux fur throw' I nearly fell about laughing.


Some of you commented on the picture DH took of the buses in London. When I told him about the feedback (he does not read my blog), he said he had another picture. He goes up to London several times a month for work and happened to be there on the day of the State Opening of Parliament. Because all the roads were closed off there were huge traffic jams. He always has his camera with him and snapped this picture of a traffic jam composed entirely of London Buses on Waterloo Bridge.


Thursday, March 05, 2009


Another friend had a baby - I'm hoping to finish his quilt before his fifth birthday!! I've never made a 'proper' hourglass quilt before and as it's a boy I've chosen red, white and blue. I thought I would probably have to cut down the blocks to make them nice and square but (fingers crossed) they seem okay so far. I used the EZ Angle ruler to make the triangles from strips. This quilt seems to have a lot more new fabric in it than I usually use - though naturally there is fabric from the odd shirt or two tucked in there.

Saturday, February 28, 2009

London Calling

Bit of a blog break there - we had a few days in London over half-term - didn't take any pictures myself but here's a couple that DH took - the London Eye at night and a row of London buses with The Gherkin in the background. I know feelings are mixed about The Gherkin, but I think it's a great building.

When I was a kid, if we ever went to London we always had to 'look out for someone famous' - the premise being that London is full of famous people and you've only got to keep your eyes open to spot one. Needless to say, we never say anyone remotely famous, until now that is, when we saw David Blunkett catching a train to Sheffield while we were waiting for our train home.

Part of the reason for the break was that my daughter had a briefing session for the course she is starting at University in the autumn, so we thought we might as well all go too (to London, not to the briefing session, that would have been well embarrassing).

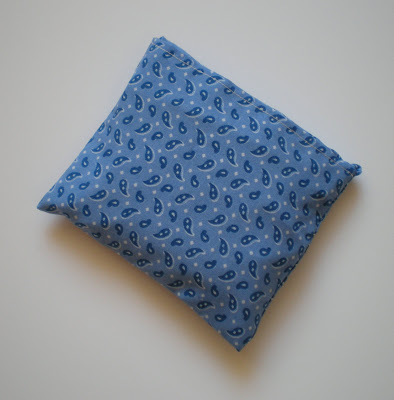
I also found time to find my way to Fabrics Galore in Lavender Hill. I did succumb to temptation, but really, I think I need to call a halt to fabric buying and start using it - otherwise I'm in serious danger of running out of anywhere to put it.

Saturday, February 07, 2009

Ecobag

Nowadays it seems de rigeur to refuse a plastic bag in favour of one you've brought along yourself. Before Christmas I bought this Japanese pattern book for eco-bags from e-bay:


The link to the page on e-bay is here and shows more pictures from inside the book. There are lots of great quick-to-make bags to save on using up plastic ones. It's taken me until now, but here's the first one I've made. I used some old poly-cotton that has been hanging around for years waiting for its time to come. Well, poly-cotton, your time is now - 100% cotton would probably be too thick to use in this bag, in the book it looked like they used rip-stop nylon for strength, but the thought of sewing slippery nylon gives me the shudders - poly cotton is bad enough.
You fold up the bag into the little pouch that you can see attached to the top - about 3 X 4 inches - just right to pop in your handbag.
And here it is, modelling a loaf of bread to show its capacious properties. Actually, if I made another one I would probably make it a bit longer, this was the largest of 3 size options and even so, I think it's a tad short. The other problem I had was converting all of the measurements from centimetres to inches, because my rulers only have inches on them. Even though we 'did' metric measurements at school, I'm still an unreconstructed ounces, pounds, inches, yards kind of a woman. Still, that's my problem, the instructions in the book were really clear and I just followed the pictures. I'll definitely make more bags from the same book.

Tuesday, February 03, 2009

Can you tell what it is yet?


Leslie and I have been chatting about feeling the yearning to knit but not wanting to make a man-size jumper but something small, like a baby item or a teddy bear (big hint there). We loved Lucy's knitted bear, Rainier, and it reminded me that I made a bear from a pattern in the same book as Lucy last year (you can see it here), and that I had actually knitted up all of the individual pieces for another one in the summer. But sewing up the pieces is my least favourite part of the process so I just left them to fester in the meantime. Now I've published a picture of the pieces I feel kind of obligated to sew them up so watch this spot.
When I fished them out of the bag I had put them in, I also found these. I bought them in Carlisle at Christmas, they are made of papier mache, the large head is about the size of a ping pong ball. I thought they would look good with arms and legs made of yo-yos. (Though goodness knows when, if ever, I'll get round to that!)

Saturday, January 24, 2009

No-sew Valentine Garland

I'm back in the creative groove. I am always so behind in making seasonally appropriate items, but no longer - look at this - a whole three weeks in advance of the day. I was desperate to use some of the red and white fat quarter fabric that Andrea had sent me and this idea had been in my head for a while (several years actually - I like to let my ideas mature don't you know).


I thought I might as well take a few pictures along the way so here it is - my no-sew heart tutorial.


BTW - the background is my old cutting board that I don't use for cutting fabric, it is messy and horrible but ideal for a base to cover the table while I glue.


Here's all you need:
  • cardboard from a cereal carton or the like
  • scraps of batting
  • glue gun
  • cotton fabric
  • ribbon
Step 1
Draw round a heart template on your cardboard, I used 5 hearts in my garland but you could have as many as you like.


Step 2
Cut the hearts out of the cardboard

Step 3
On the coloured side of the card, use your glue gun to put 3 dots of glue on the heart shape (one near the point and the other 2 either side of the 'V', if you see what I mean). There is no need to spread the glue all over the card, this is just to hold the batting in place so that it doesn't move around so three dots are all you need.

Step 4
Plonk the card glue side down on a scrap of batting - I used what I had around - you want it to be a fairly high loft to give the heart some shape.

Step 5
Cut the batting level with the edge of the card.
Step 6
Cut your fabric about 1/2 inch bigger than the heart template (I just drew round the template I used for the card and cut the fabric a bit bigger by eye, but you could make another template just for the fabric)

Step 7
Position the card, batting side down on the wrong side of the fabric, making sure that it is placed in the middle of the fabric.

Step 8
Holding all the layers together, turn it over and pin the fabric to the batting.

Step 9
Pull the fabric over to the back of the heart and glue it down all around the edge with the glue gun. I made sure that I stuck down the top and the bottom of the heart first, because you have to pull the fabric quite firmly and that way it doesn't shift around too much. The back of the heart should then look like this ...

... and the front of it should look like this.

Step 10
Take a piece of ribbon long enough to go through all of your hearts with excess at the ends to hang your garland from. Glue the ribbon to the hearts with a dot of glue at each side of the heart, leaving about an inch of ribbon between the hearts.

Step 11
Use your heart template again to cut more heart shapes, this time out of pelmet vilene - you need to cut a smidgeon within the line you have drawn so that you can't see it from the front of the heart. Because I am a lazy good for nothing woman, all I did then was to glue the pelmet vilene onto the back of the hearts - after all, no one's going to see them, they're against the wall. But ... you could do it in a couple of different ways, depending on your inclinations. You could either use the same fabric as the front to sew a heart shape to the back, turning in the edges as in applique, or, you could use heat'n'bond to fuse fabric to the back of the heart.

After you have done this, your garland is ready to hang and will look something like this.


Which looks okay - but we all know that more is more and I think the addition of some ribbon bows does add a little je ne sais qu'a (or even je ne sais quoi - who would believe that I've got A-Level French?)


And there you have it - a very quick and easy Valentines Garland