Now, it would have been nice to do hand applique on this because I like the slightly raised effect it gives and the softness of it but ...
(a) the design is way to complicated for a novice like me to hand applique
(b) even if it weren't, it would take me weeks to complete it and my whole raison d'etre for trying doll quilts is that I might even finish a few.
(c) the idea of sewing by hand is I fear, just not for me

In my usual copy-cat mode I really liked the tiny machine stitches Jane used in her Trumpet stars quilt so I thought I would give that a go instead. Here's my progress so far, I fused all the fabric and I've zig-zagged the lighter leaves and stem and I'm liking how it's going up to now. I might do a bit of freehand machine embroidery on the tops as this is very similar to doing fabric postcards. I had fused some yellow centres on the flowers but the colour was too bright so I ripped them off and I'm going to substitute a more subtle hue. Hoping to work on it in the evenings this week (work permitting).
I like hollyhocks, the garden of a house near my son's school is full of them in early summer and they look absolutely spectacular. Never had any success growing them in my own garden, they either don't come up or when they do they are the spindliest plants you've ever seen with one solitary flower. I'll make up for it with my fabric version.


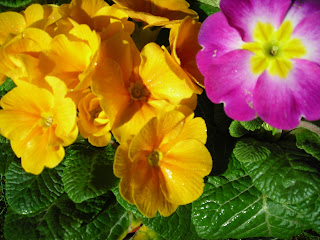
 It's a National Trust property and quite unusual in that it has been preserved in a state of decay and the contents are just as the last owners left it - quite amazing, particularly the attics which are full of old trunks and toys. It has superb gardens and grounds to walk in. The pansies are in the 'Auricula Theatre' (only it has pansies and not auriculas at the moment - I have seen it with auriculas in previous years - click on the link above and there are lots of photos of the house and garden in the gallery).
 However, before I went I did sandwich my depression block top - here it is, don't know what happened to my maths capability either because if you look you will see there is a scant 1 inch of spare backing at the top and bottom - I assure you I didn't mean to be quite so parsimonious as that.
  So far I have only managed to quilt about a quarter of the top, I'm using the peacock feathers that I've seen on
  In those days my Nan and Grandad took my Mum and her brothers when they were children and camped. Then when static caravans took over they would rent a caravan and eventually my Mum bought a caravan on the site and my uncle has one too. When I was little we used to go on there on huge long holiday trains with many carriages from Birmingham but now hardly anyone goes on holiday by train. Whilst the weather was good, my Mum's caravan is quite old and on it's last legs, it had developed a couple of leaks in the water pipes over the winter so I couldn't have a shower and it may have been lovely in the day but it was bloomin' freezing at night.
  The photos are of Aberdovey, the next town along the coast - there was an article about it in one of the UK newspapers which described it as stepping back into the 1950's - and that's just what it is like, very unspoilt and traditional. DS loves to dig in the dry sand and you can collect bucketfuls of shells, and in Tywyn there are rock pools to fish in - a kid's paradise but not so attractive to my 17 year old daughter, who stayed at home with her Dad so it was just me, my Mum and my son who went. By the way - I haven't altered the colours in the photograph, the sky really was that blue, in early April, in Wales. (For those of you for whom the significance of this is lost, the weather in Wales is famous for rain and lots of it. But when the sun comes out it is heaven on earth.)
 STEP 2
 STEP 3
 STEP 4
 STEP 5
 STEP 6
 STEP 7
 STEP 8